

Inviting a Sub-Agency
The Invite Sub-agency feature allows Agency Admins to expand their business network by onboarding partner agencies as sub-agencies directly through the NuFlights platform.
This process helps maintain a structured parent–sub-agency relationship while ensuring all newly registered agencies are validated and approved by the Platform Admin team before becoming active.
Purpose of this Feature
Using this feature, an Agency Admin can:
- Invite external agencies to join their network.
- Allow invited agencies to operate under their main agency account.
- Track invitation status and onboarding progress.
- Manage sub-agency relationships from a single location.
- Ensure all newly onboarded agencies are verified before activation.
User Roles & Responsibilities
| Role | Responsibility |
|---|---|
| Agency Admin | Sends invitations to external agencies. |
| Invited Sub-agency | Accepts the invitation or completes registration. |
| Platform Admin | Reviews and approves/rejects newly registered agencies. |
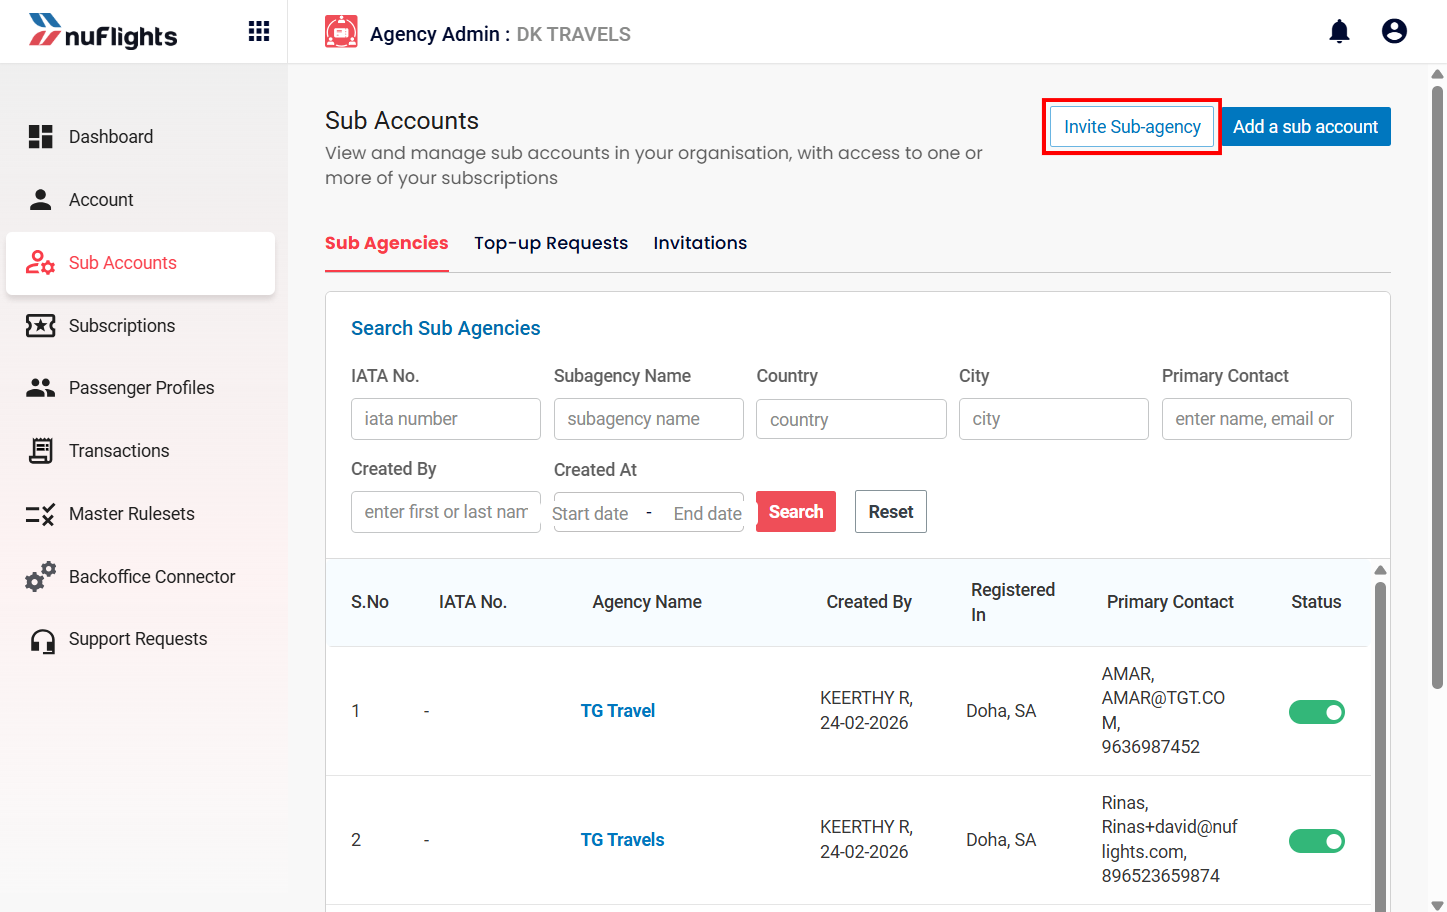
Navigation Path
To access the Sub-agency invitation flow:
Agency Admin → Sub-accounts → Invite Sub-agency
Sending a Sub-Agency Invitation
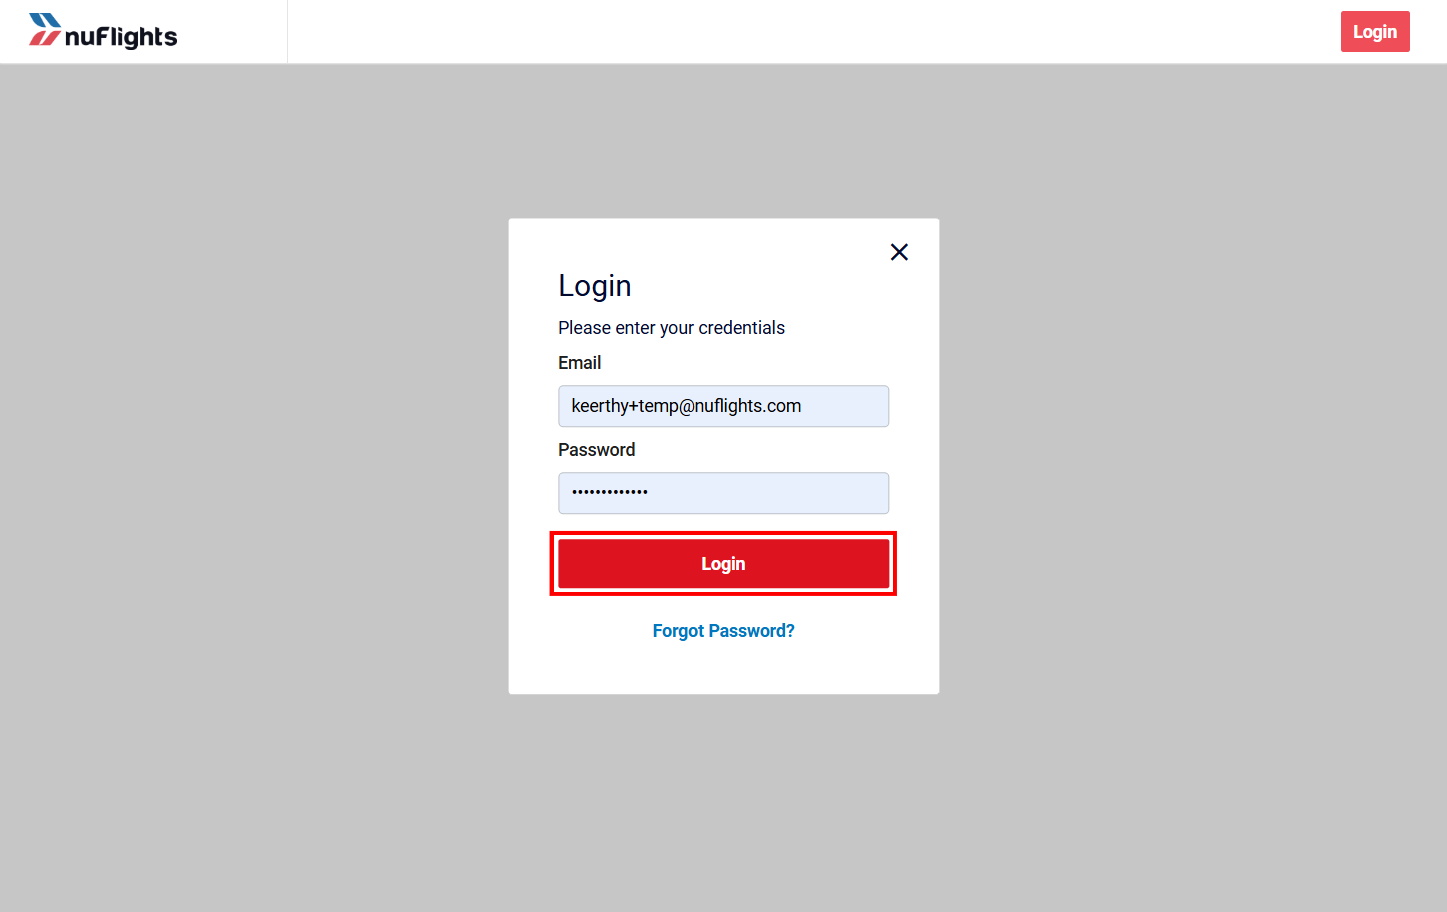
Step 1: Login to the Platform
The Agency Admin must first log into the NuFlights Application using valid credentials.
After successful login, go to Agency Admin dashboard.

Step 2: Navigate to Sub-accounts
From the left-side navigation menu:
- Open Agency Admin
- Click Sub-accounts
Step 3: Click “Invite Sub-agency”
On the Sub-accounts page:
- Click the Invite Sub-agency button.
This action opens the invitation form where the Agency Admin can enter the sub-agency details.
Invitation Form Details
The Agency Admin must complete the required fields before submitting the invitation.
Required Fields
| Field | Description |
|---|---|
| Organization Name | Official business name of the invited agency |
| Email ID | Primary email address used for communication and onboarding |
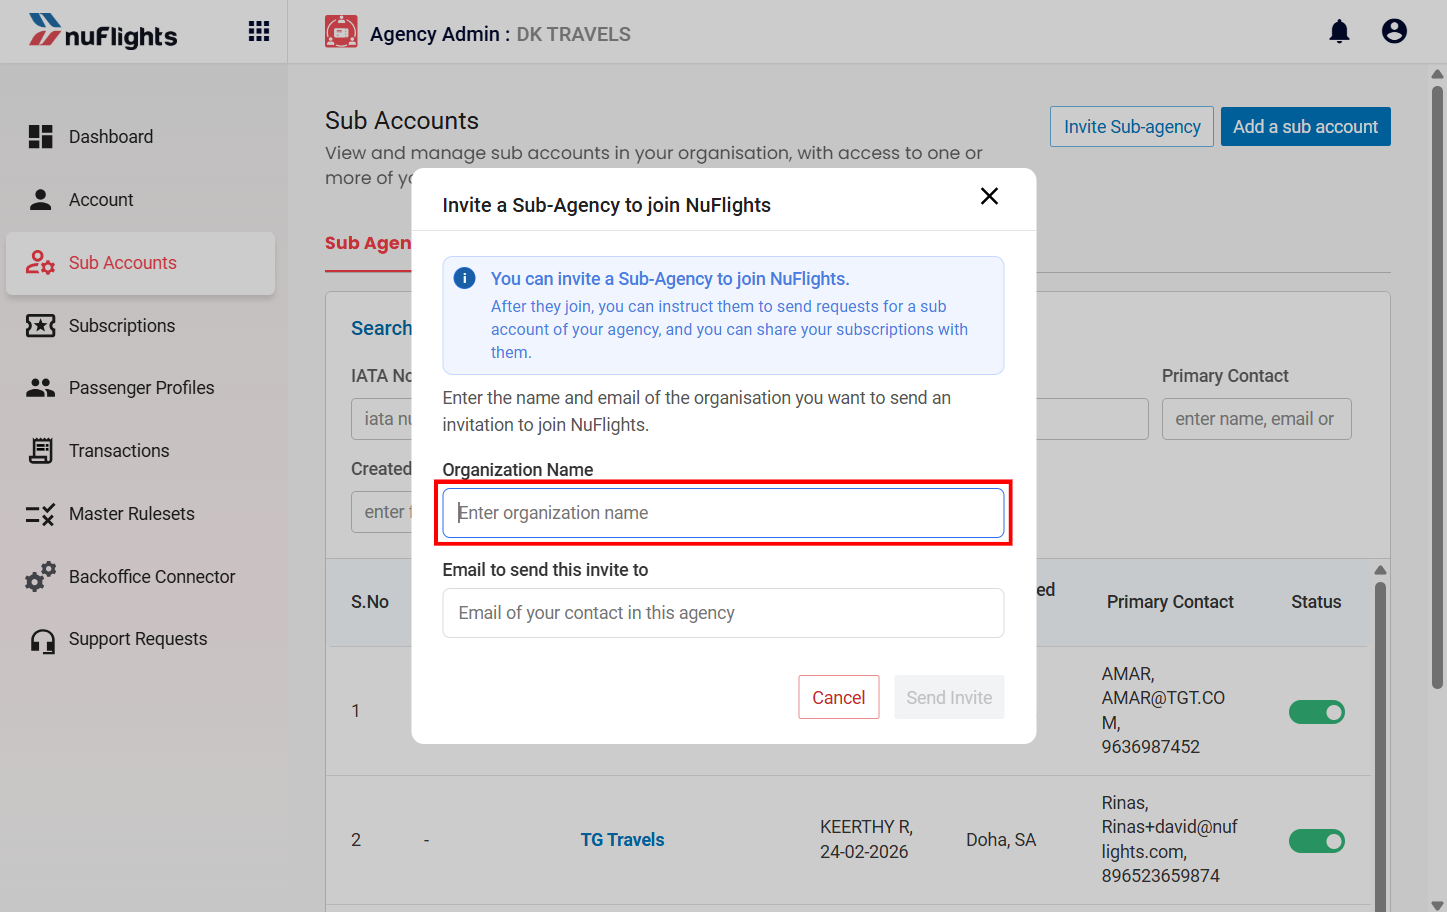
Step 4: Submit the Invitation
After entering all required details:
- Click the Submit button.
- The system processes the request.
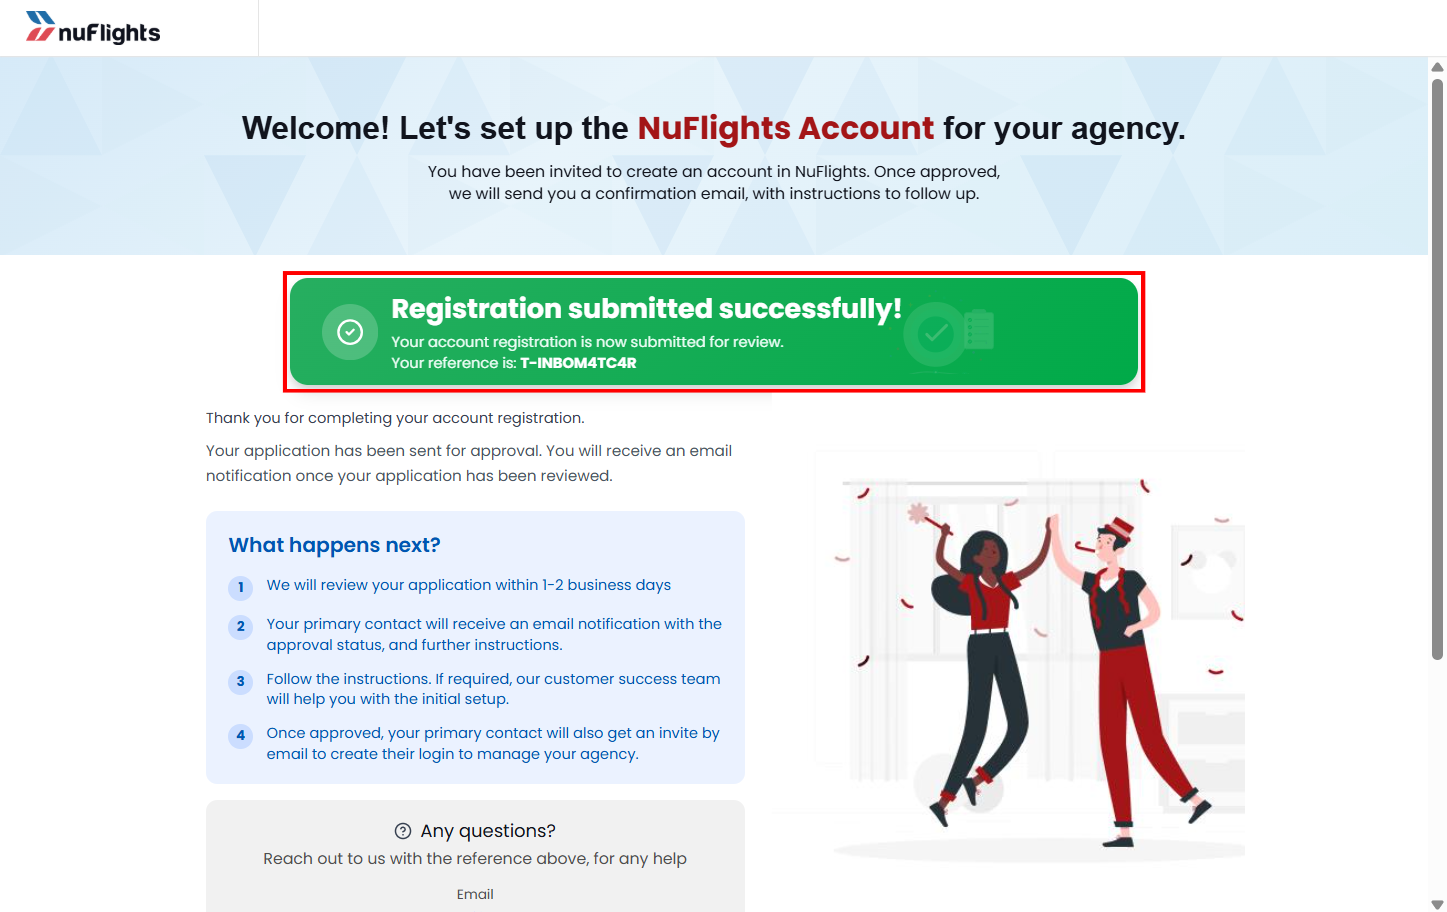
- A success confirmation message is displayed.
Example:
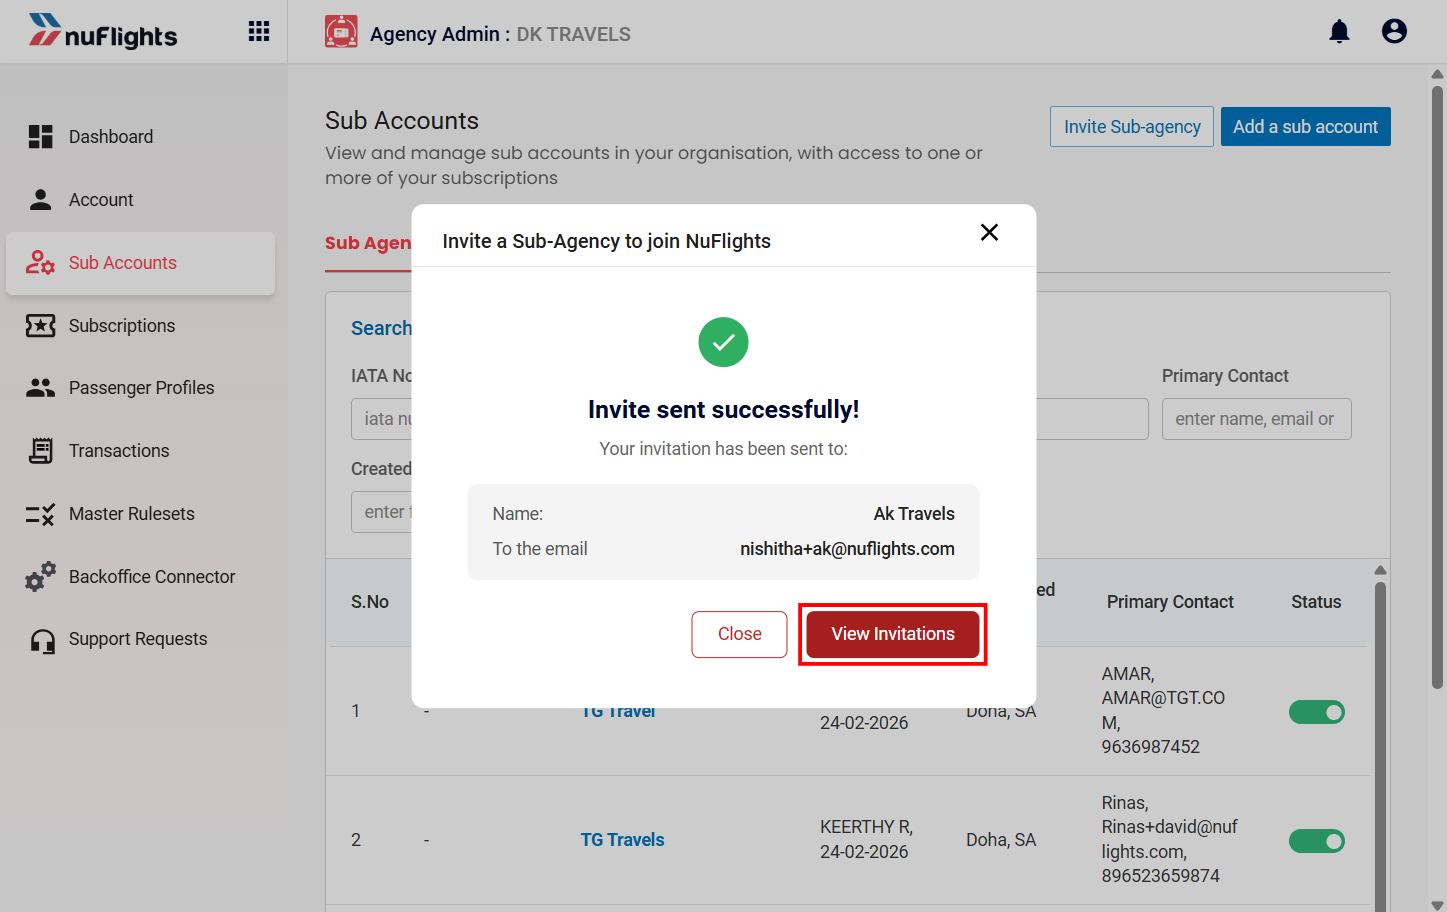
After Submission
Once the invitation is successfully submitted,the invited agency receives an automated email notification. The email includes:
- Inviting agency information
- Invitation details
- Login/Register action buttons
- Next onboarding steps

Sub-Agency Onboarding Flow
The onboarding process differs depending on whether the invited agency already has a NuFlights account. There are two possible onboarding scenarios:
- Existing NuFlights Account
- New Agency Registration
Scenario 1: Existing NuFlights Account
If the invited agency already has an active NuFlights account, they do not need to register again. They can directly accept the invitation by logging in with their existing NuFlights account credentials. Once logged in, the agency will be able to access the invitation and continue using the NuFlights platform as usual without any additional registration steps.
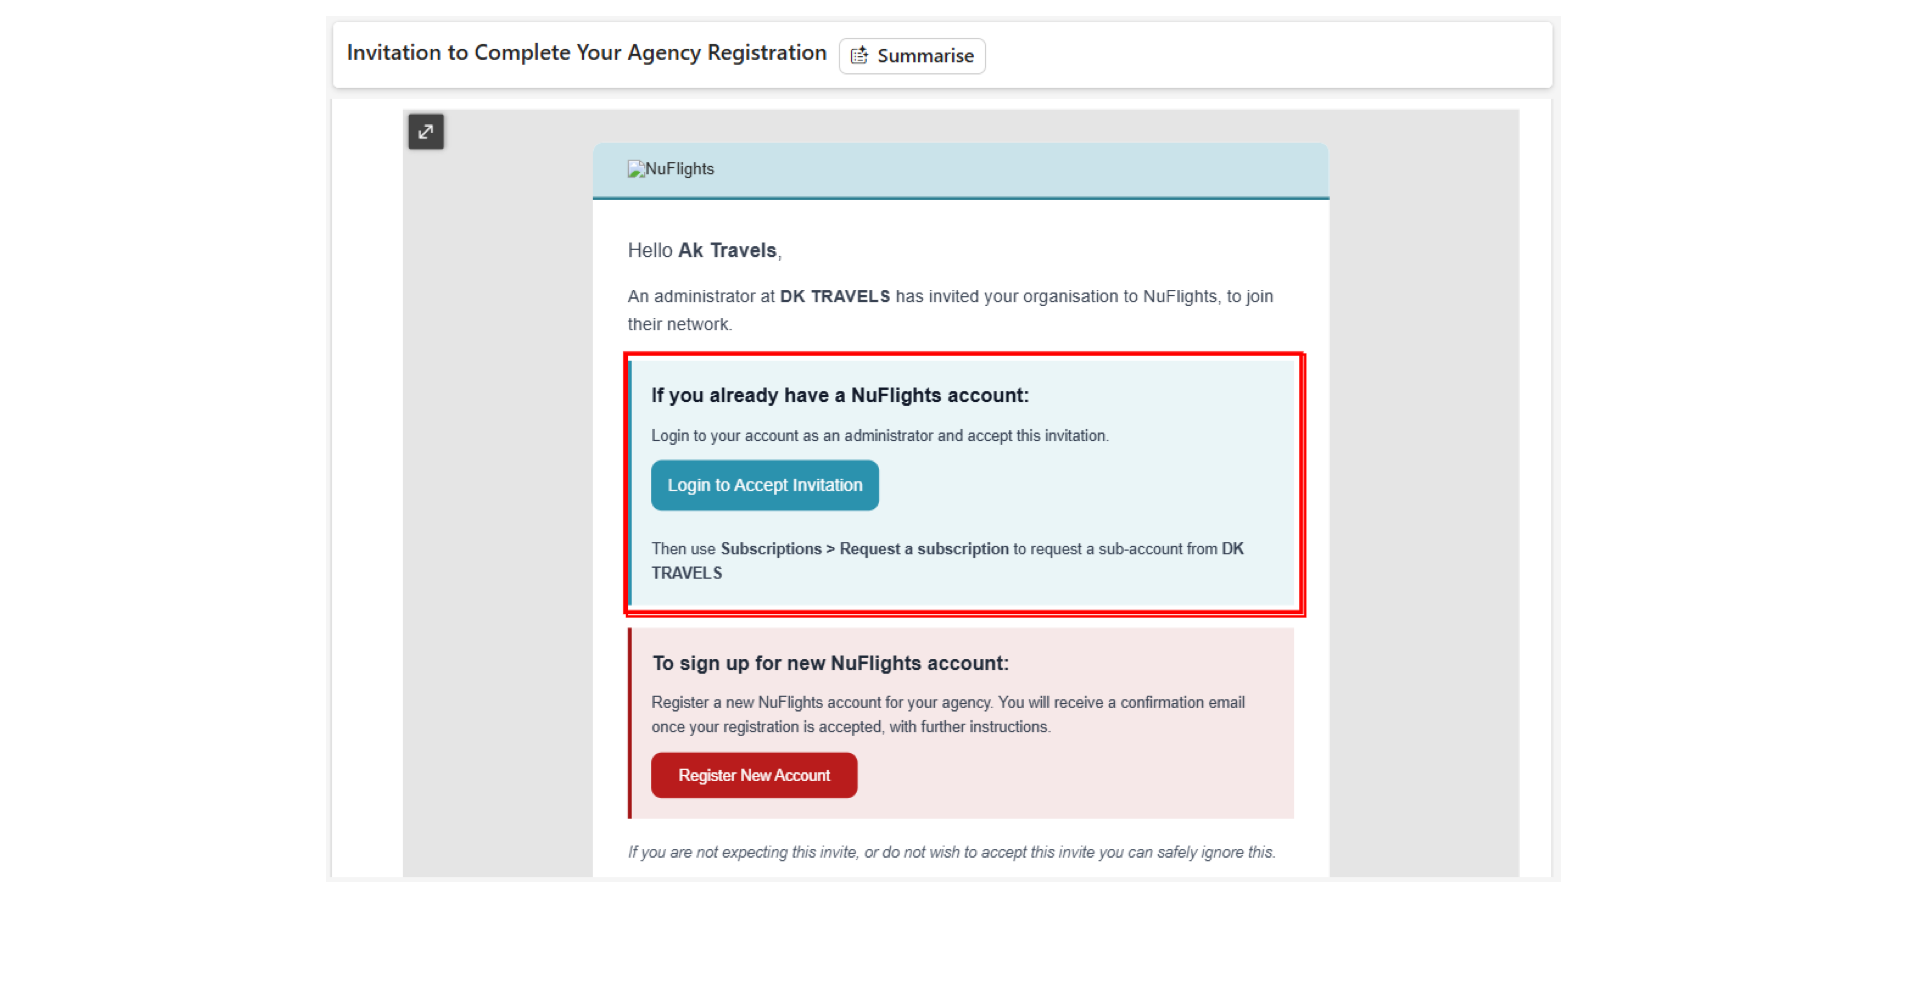
The user is redirected to the NuFlights login page.
They must log in using their existing account credentials.
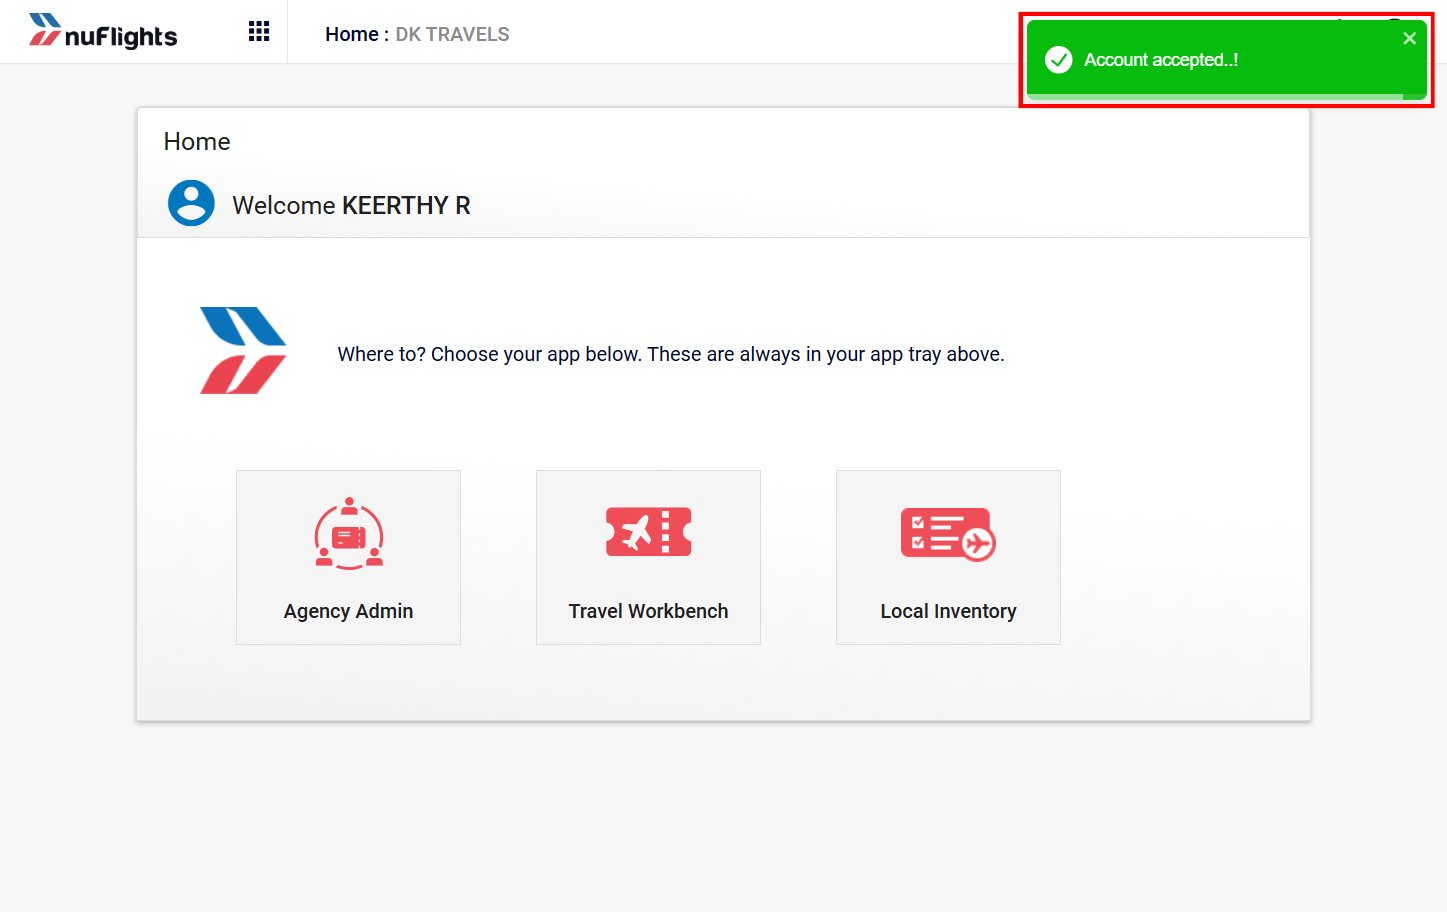
After a successful login, they will be notified that the account invitation has been accepted successfully.
After acceptance:
- The parent–sub-agency relationship is established.
- The invited agency is linked under the Agency Admin.
- The sub-agency becomes visible in the Sub-accounts page.
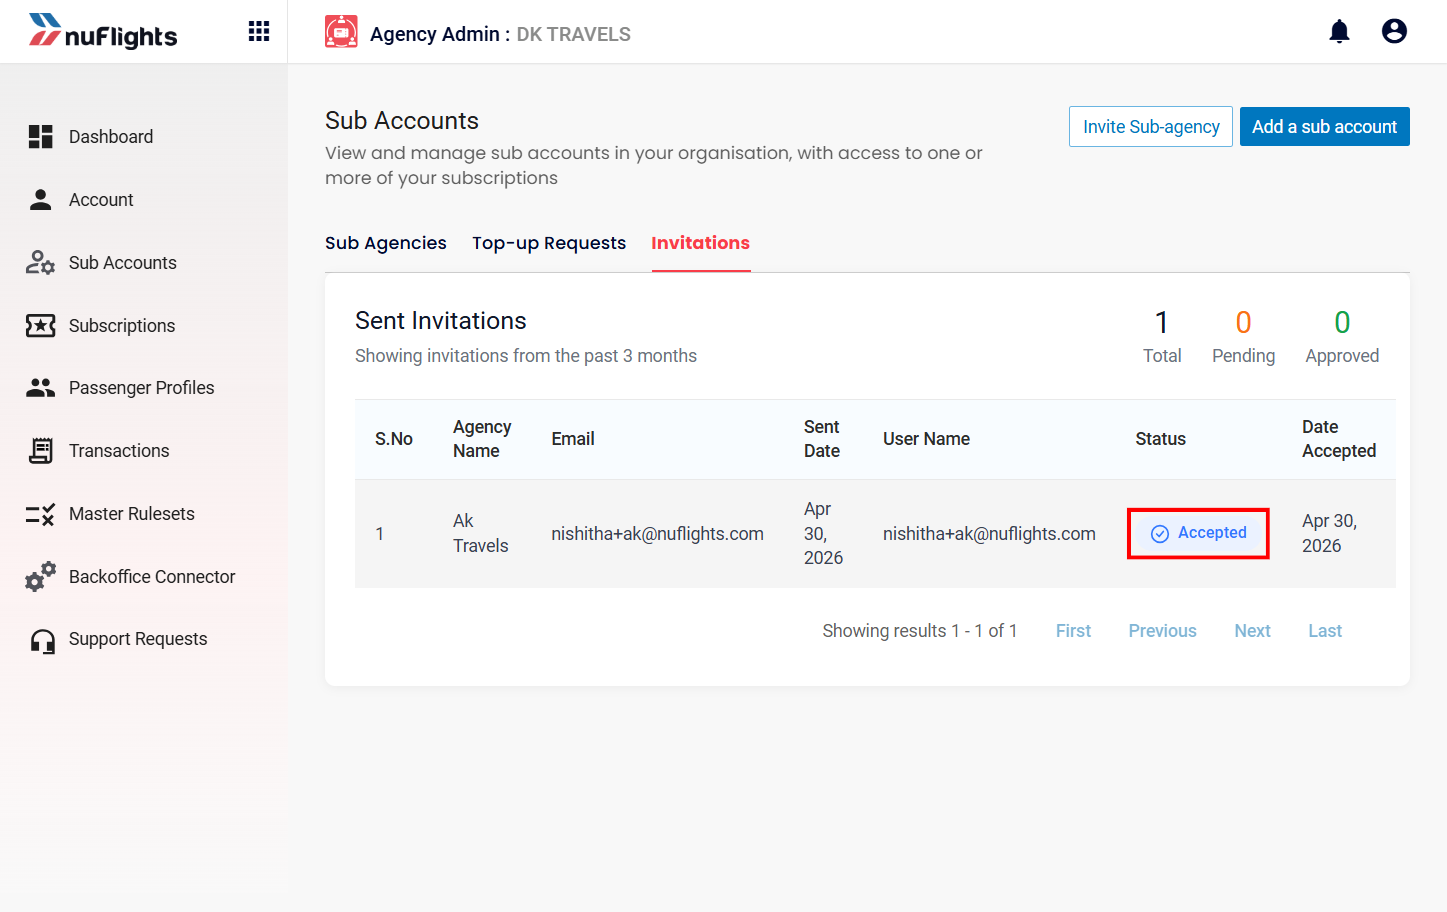
Status Update
The invitation status changes to:
Accepted
This status is visible in the Agency Admin -> Sub-accounts -> Invitations tab.
Scenario 2: New Sub-Agency Registration
If the invited agency does not already have a NuFlights account, they must complete the registration process before activation.
Step 1: Open Invitation Email
The invited agency opens the invitation email.
Inside the email, they click:
Register new account
Step 2: Complete Registration Form
The invited agency is redirected to the agency registration page.
They must complete all mandatory registration details.
 ---
---
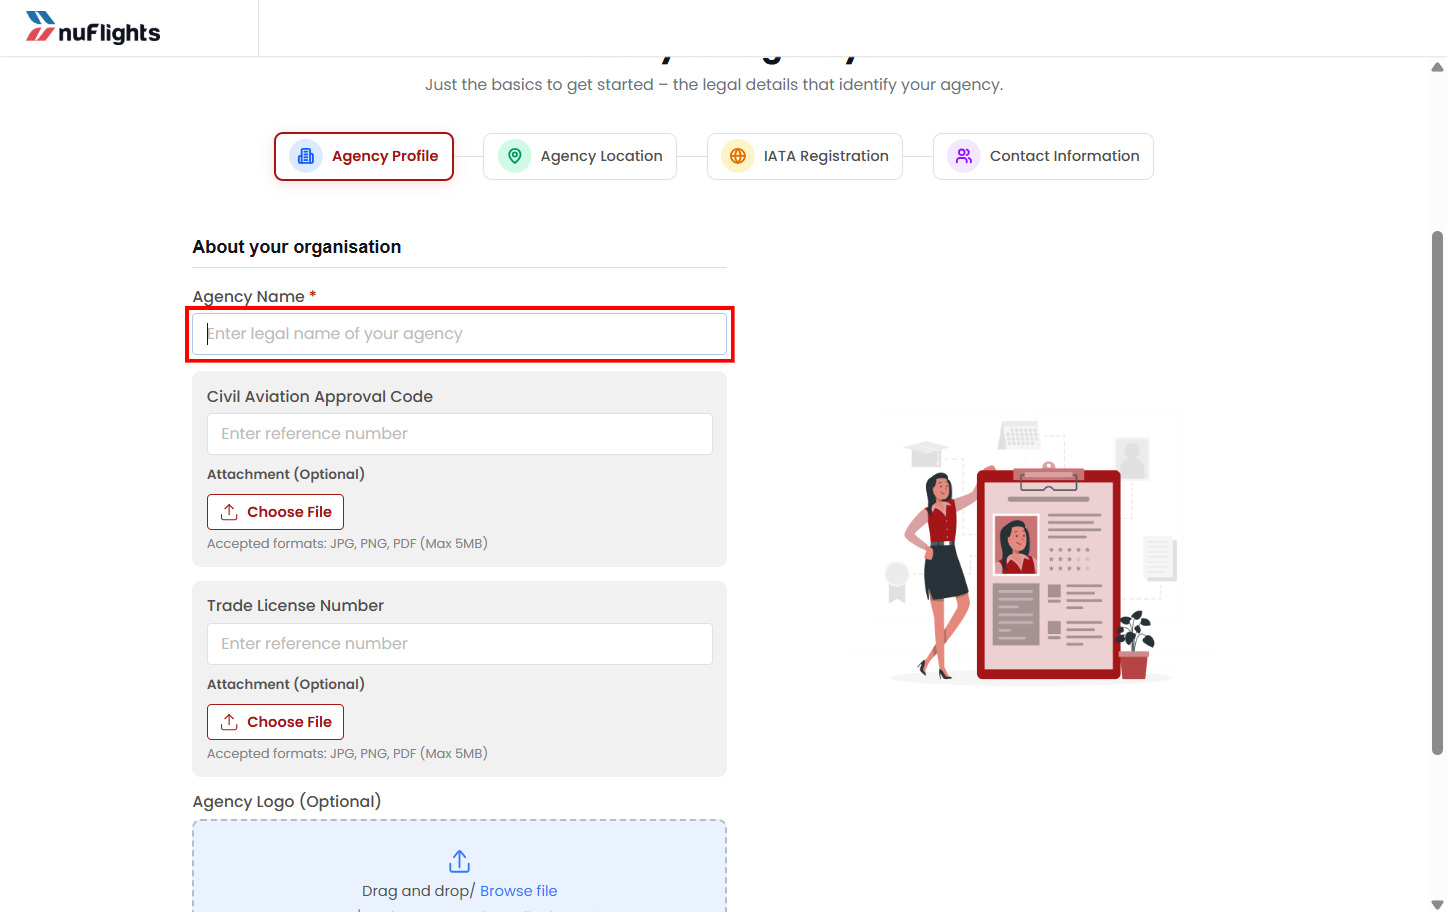
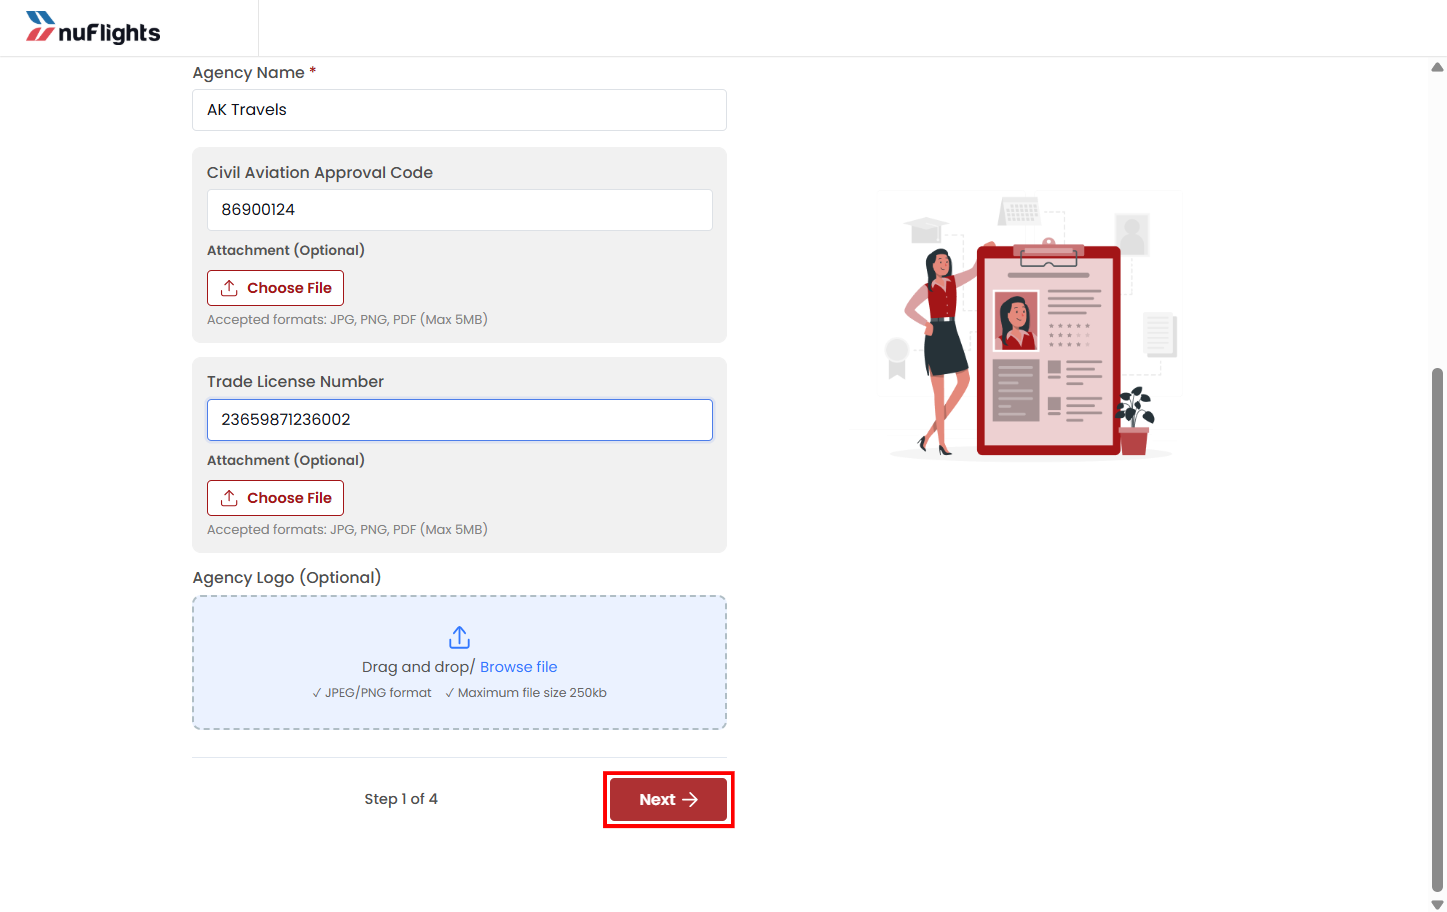
Registration Form Fields
The registration form is divided into 4 sections. Complete all the required fields in each section to successfully proceed with the agency registration process.
Agency Profile
- Agency Name
- Civil Aviation code (optional)
- Trade License number (optional)
- Agency Logo
The document upload may include validations such as:
- Supported file formats
- Maximum file size
 ---
---
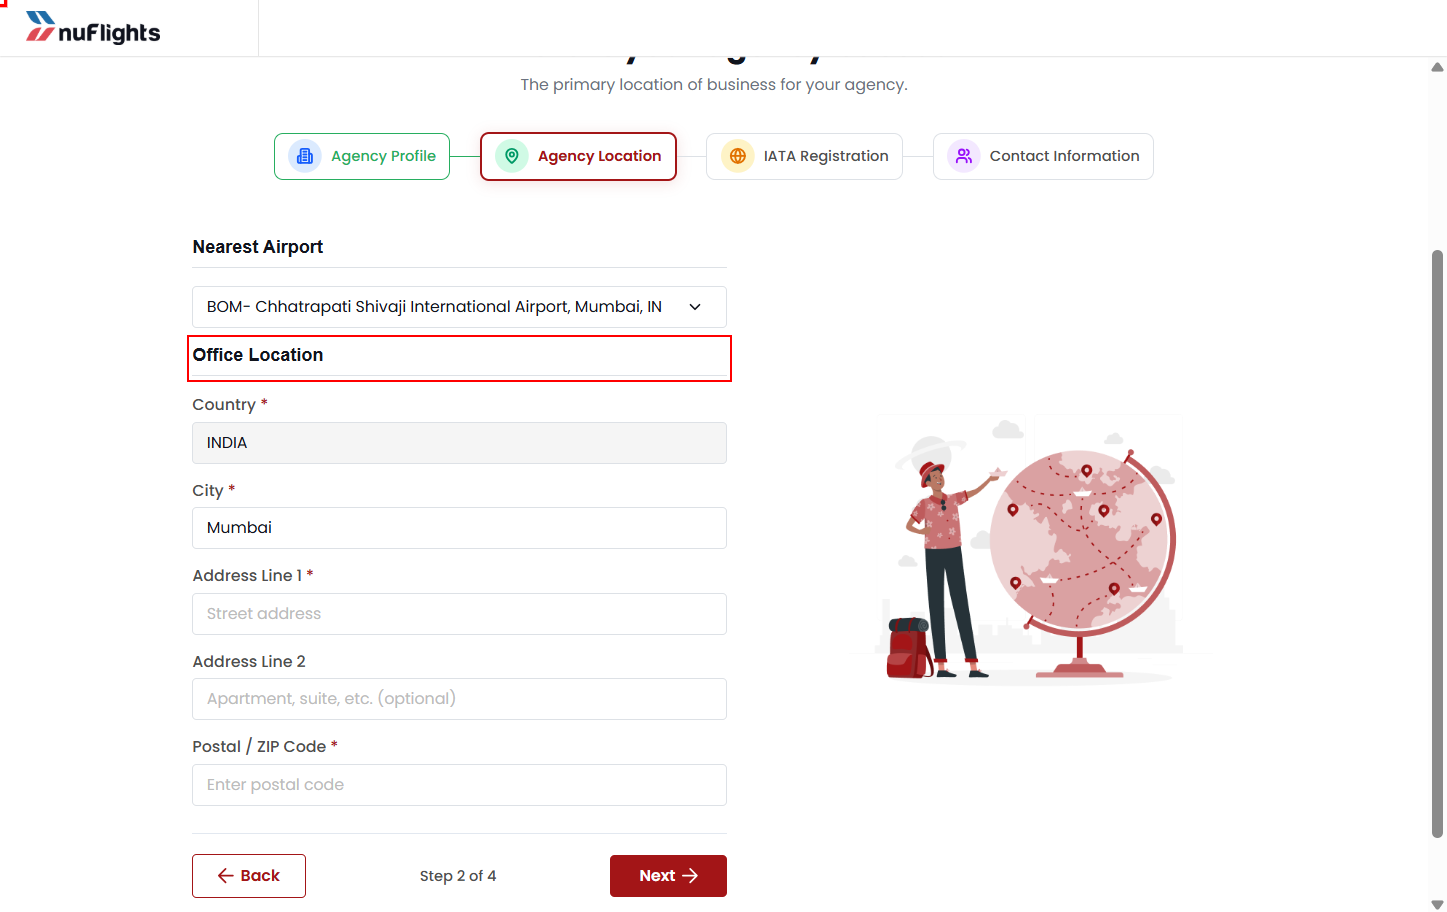
Agency Location
- Nearest Airport
- Agency Address
- City
- Country
- Postal Code
 ---
---
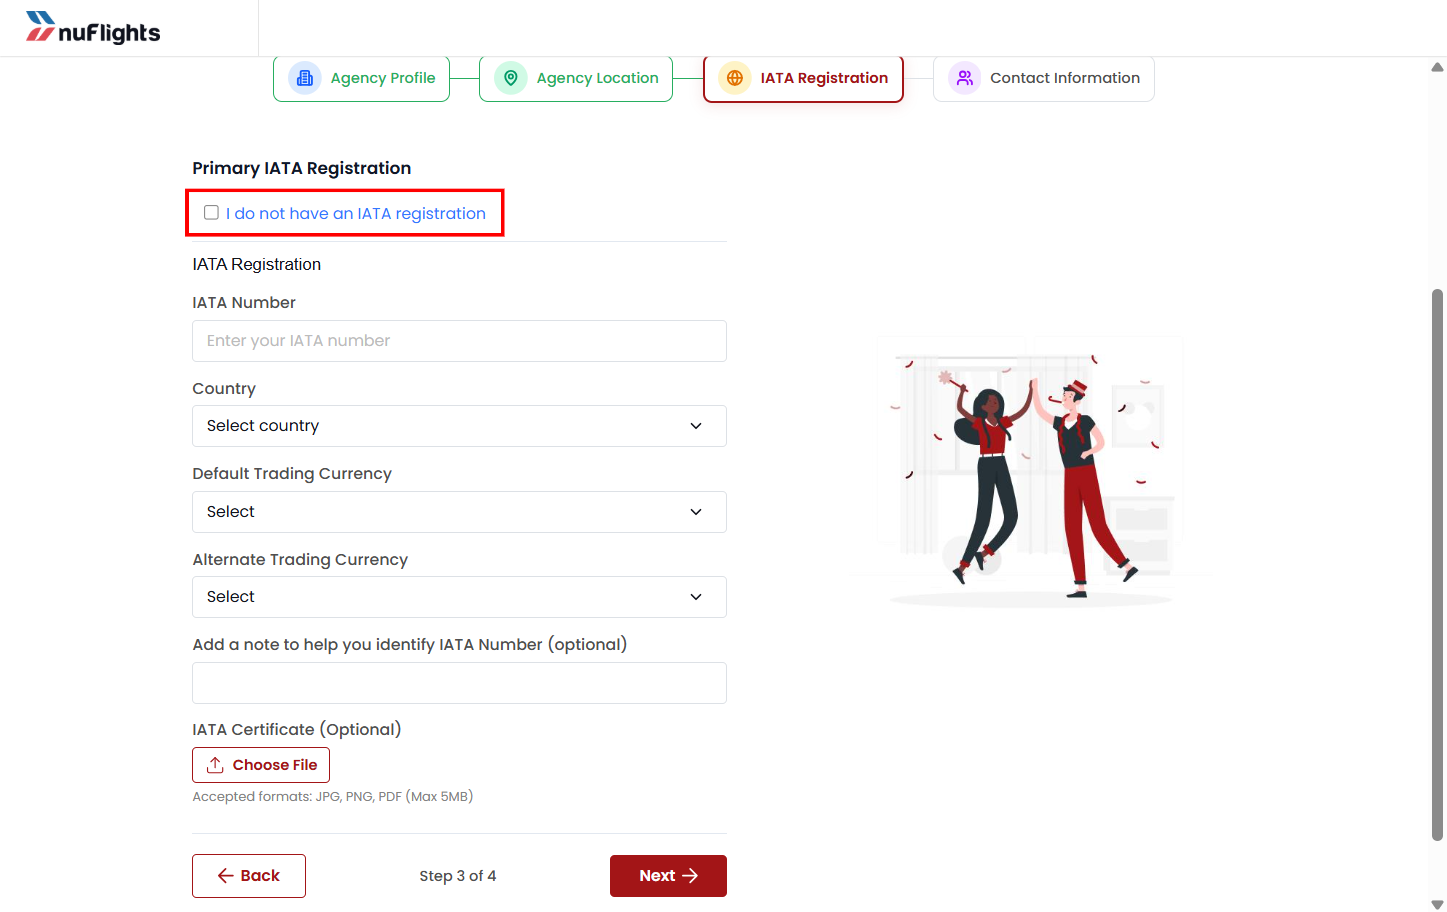
IATA Registration
This step captures IATA accreditation information.
IATA Registered Agency
The agency can:
- Enter IATA number
- Provide supporting information if required
Non-IATA Agency
If the agency does not have IATA accreditation:
- They can select:
I don’t have an IATA number
This allows them to proceed without entering IATA details.
 ---
---
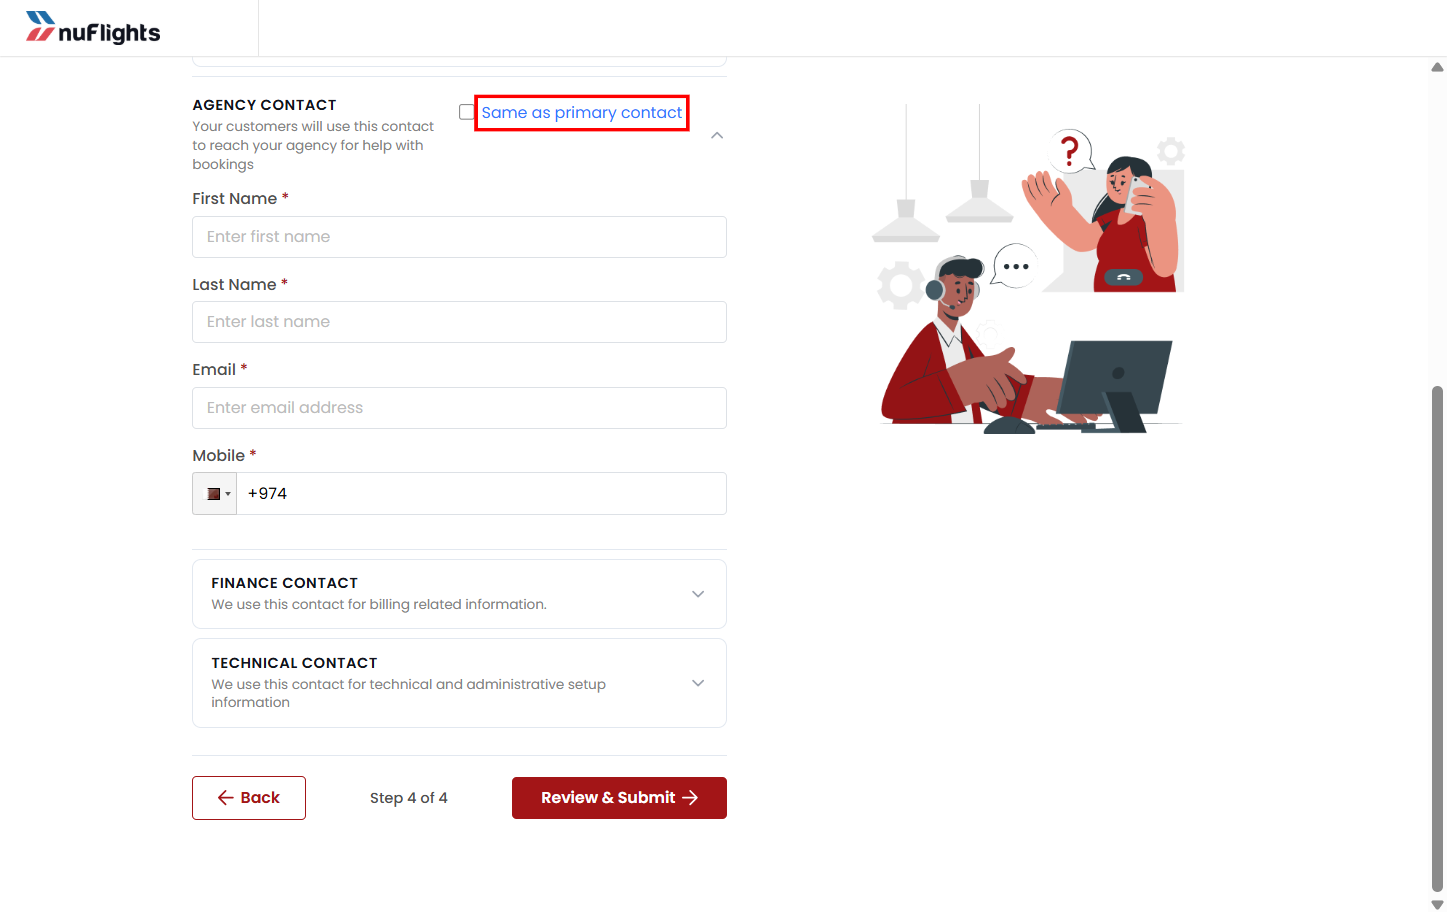
Contact Information
- Primary Contact
- Agency Contact
- Financial Contact
- Technical Contact
- Email Address
- Phone Number
If the other contact details are the same as the primary contact details already entered, you can select the checkbox “Same as Primary Contact” to auto-fill the information easily.
 ---
---
Step 3: Submit Registration
After completing the registration form, you can review all the entered details before submitting the registration.
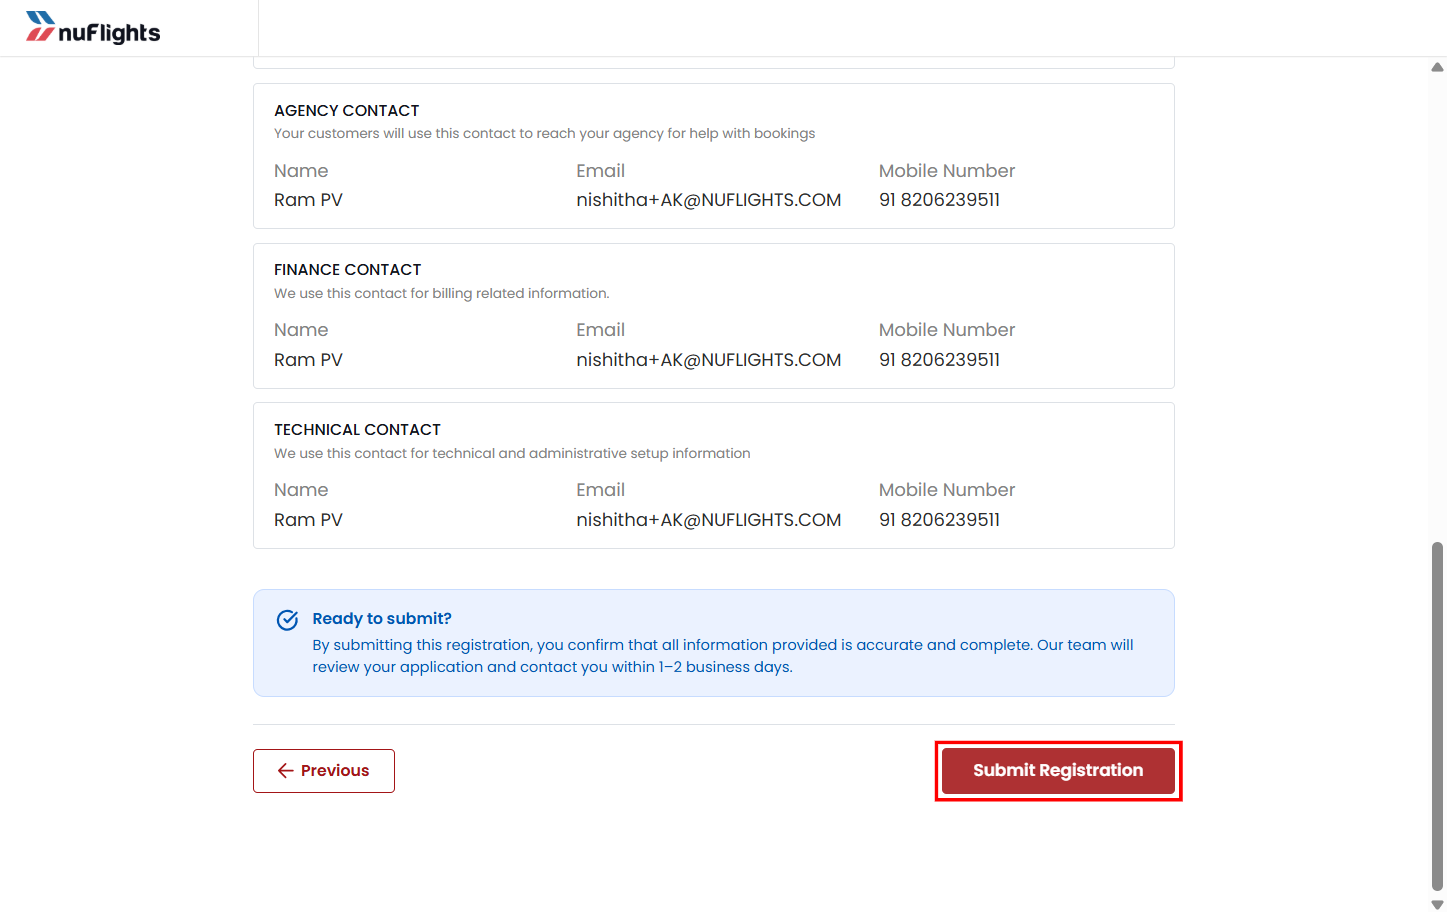
- The invited agency clicks Submit Registration.
- The registration request is created.
- The request is automatically routed to the Platform Admin for verification.
Platform Admin Review Process
The Platform Admin reviews:
- Agency details
- Contact information
- Supporting Legal documents
During this phase, the agency is not yet fully active.

Pending Approval Status
While the Platform Admin review is in progress:
- The invited agency appears in the Agency Admin’s Sub-accounts page.
- The status remains:
Pending Approval
This helps the Agency Admin track onboarding progress.
Platform Admin Decision Outcomes
Approved
If the Platform Admin approves the registration:
- The agency becomes active in NuFlights.
- The parent–sub-agency relationship is finalized.
- The agency can access platform functionalities based on permissions.
Status changes to:
Accepted
Rejected
If the registration is rejected:
- The agency is not activated.
- The rejection reason will be mentioned in the mail sent to the agency.
Invitation Statuses
| Status | Meaning |
|---|---|
| Pending | Invitation email sent to sub-agency and sub-agency has not yet accepted the invitation |
| Accepted | Invitation accepted and sub-agency registration completed |
| Rejected | Registration/invitation rejected |
| Approved | Registration/invitation approved |